


OD/TD75V Installation instruction
OD/75V installation instruction
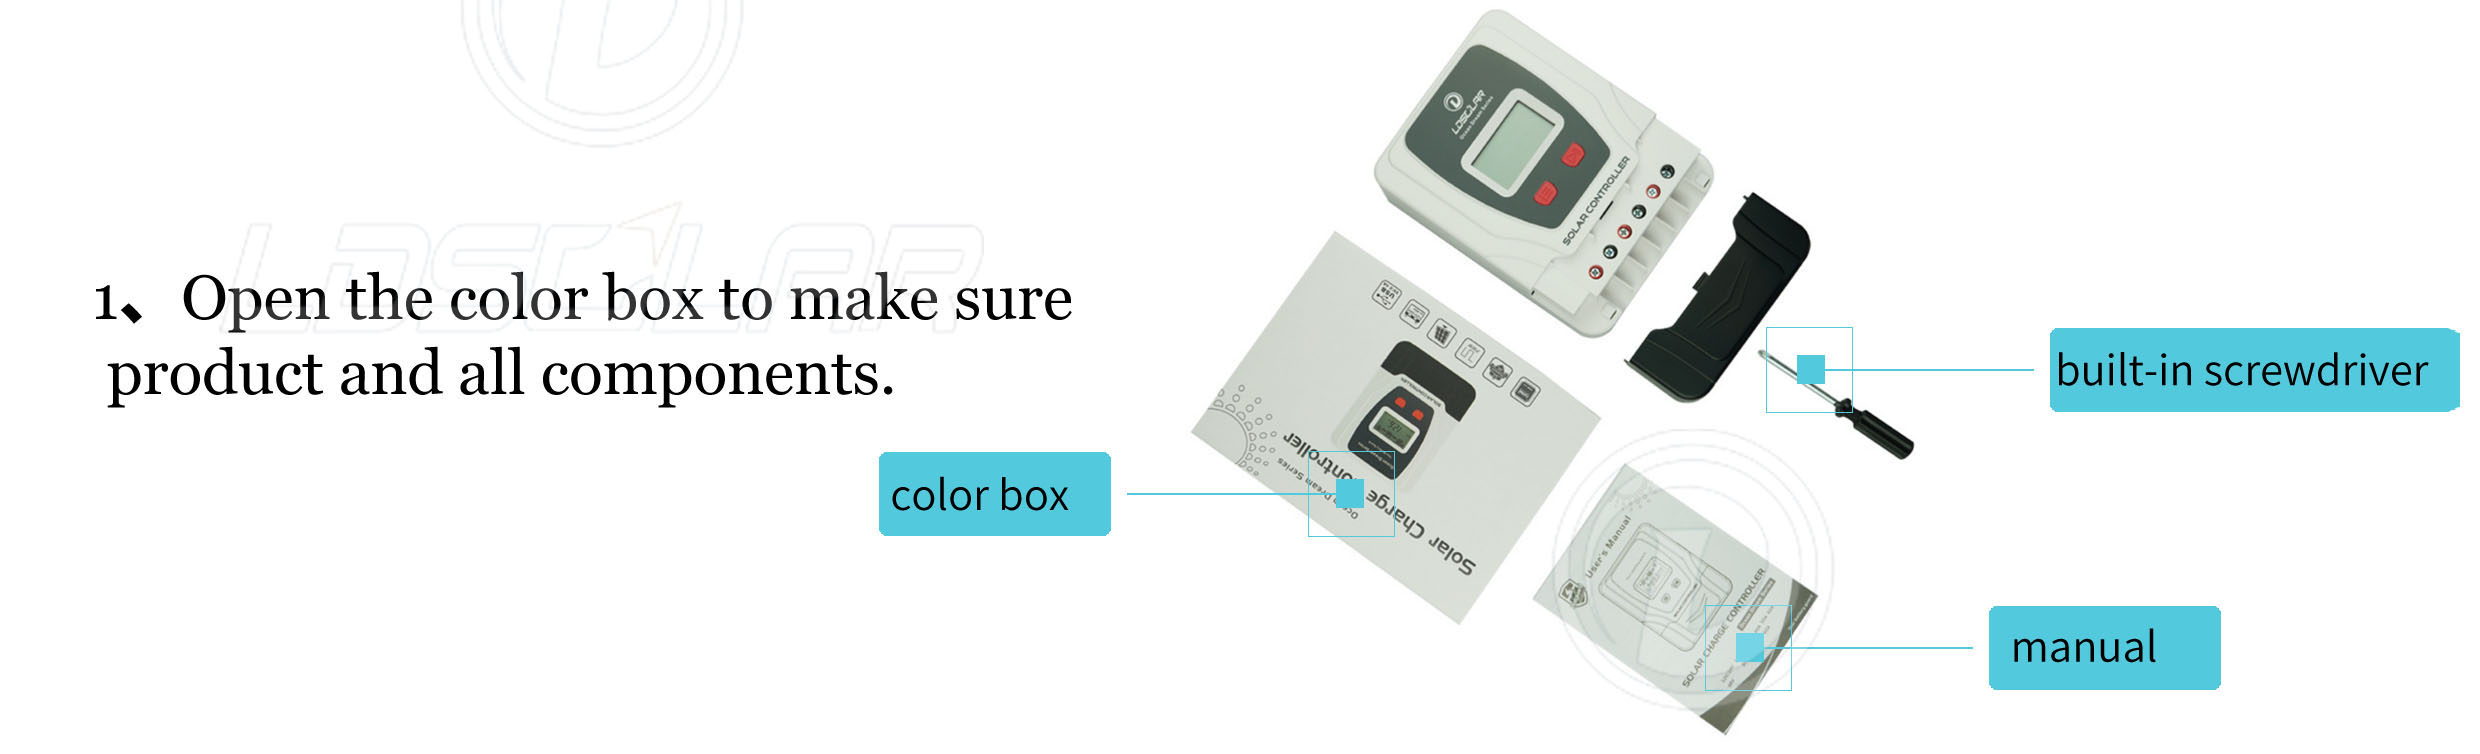
1. Open the color box to make sure product and all components.
color box,built-in screwdriver,manual
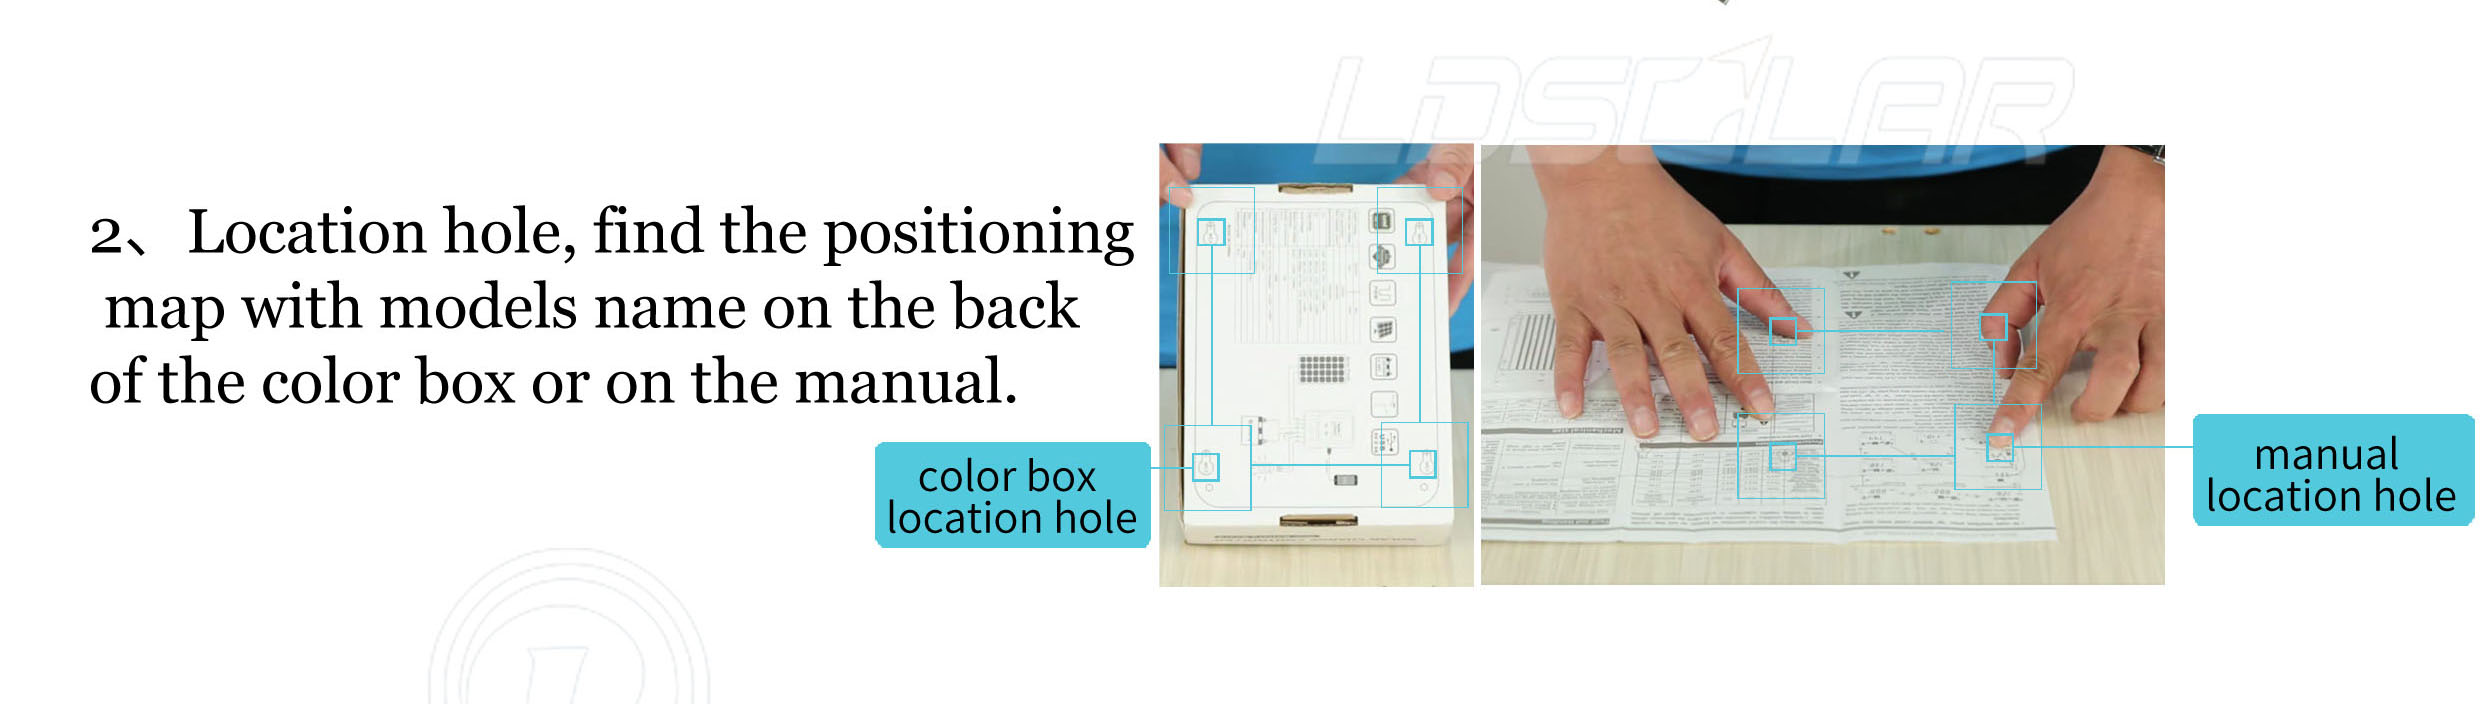
2. Location hole, find the positioning map with models name on the back of the color box or on the manual.
color box location hole, manual location hole
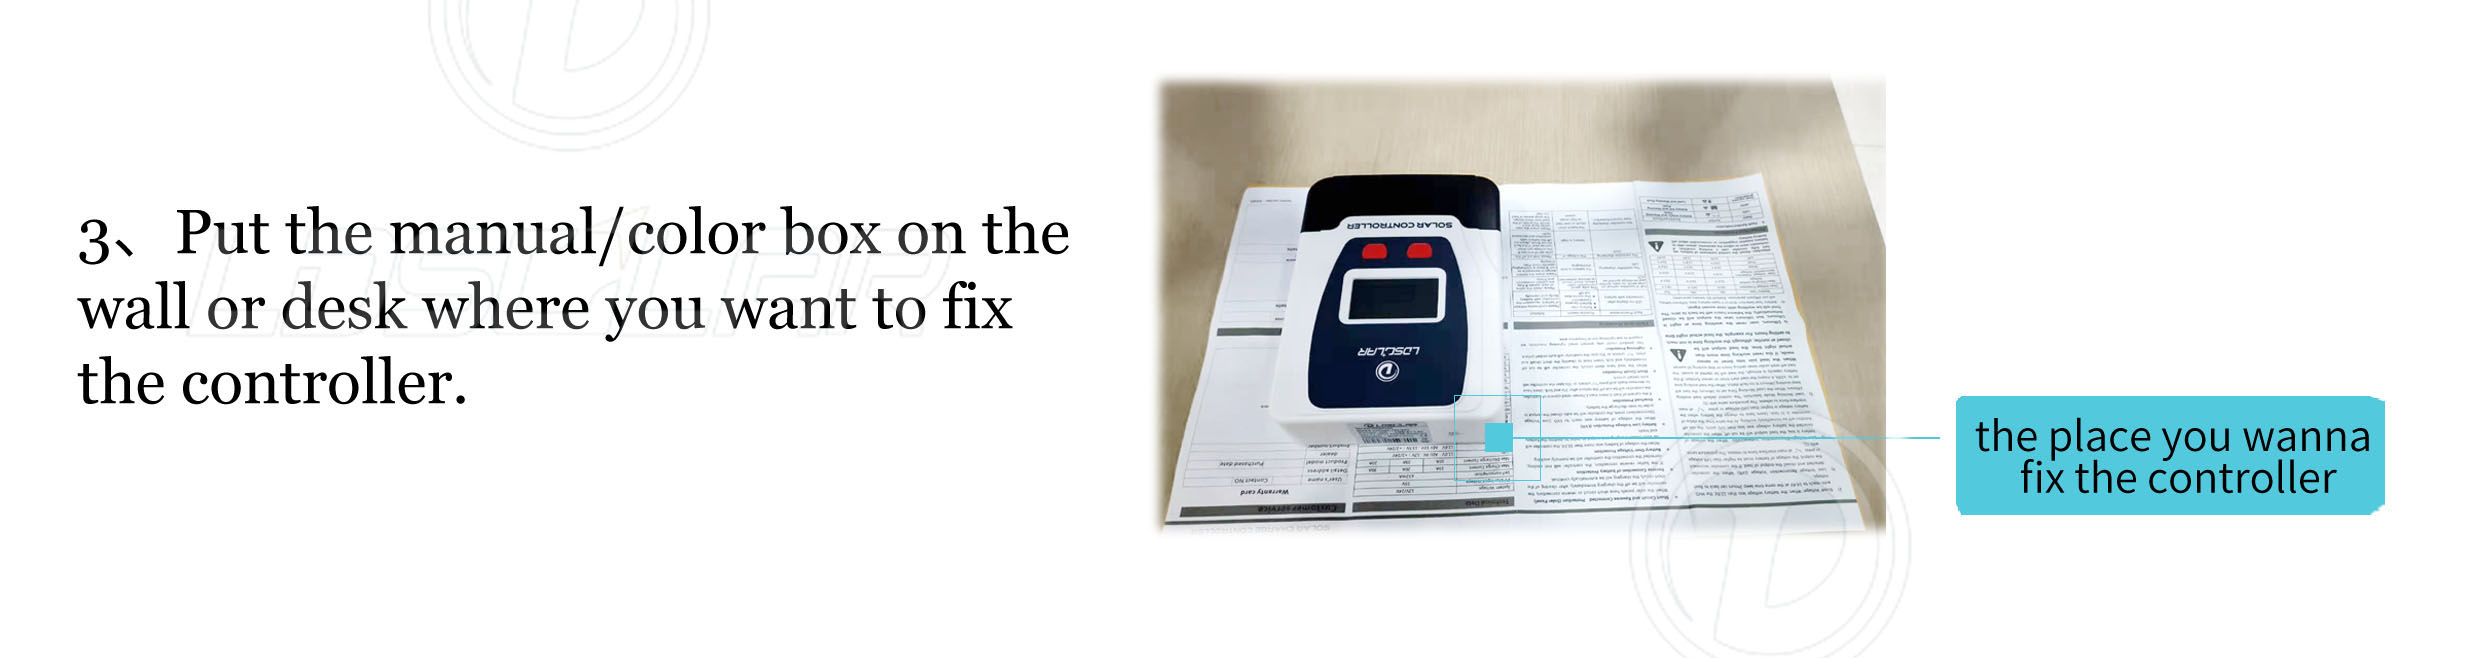
3. Put the manual/color box on the wall or desk where you want to fix the controller.
the place you wanna fix the controller
4. Impale the location hole with screwdriver or other sharp object and mark the position of the holes on the wall or desk that need to be fixed.
use sharp object to impale and make mark

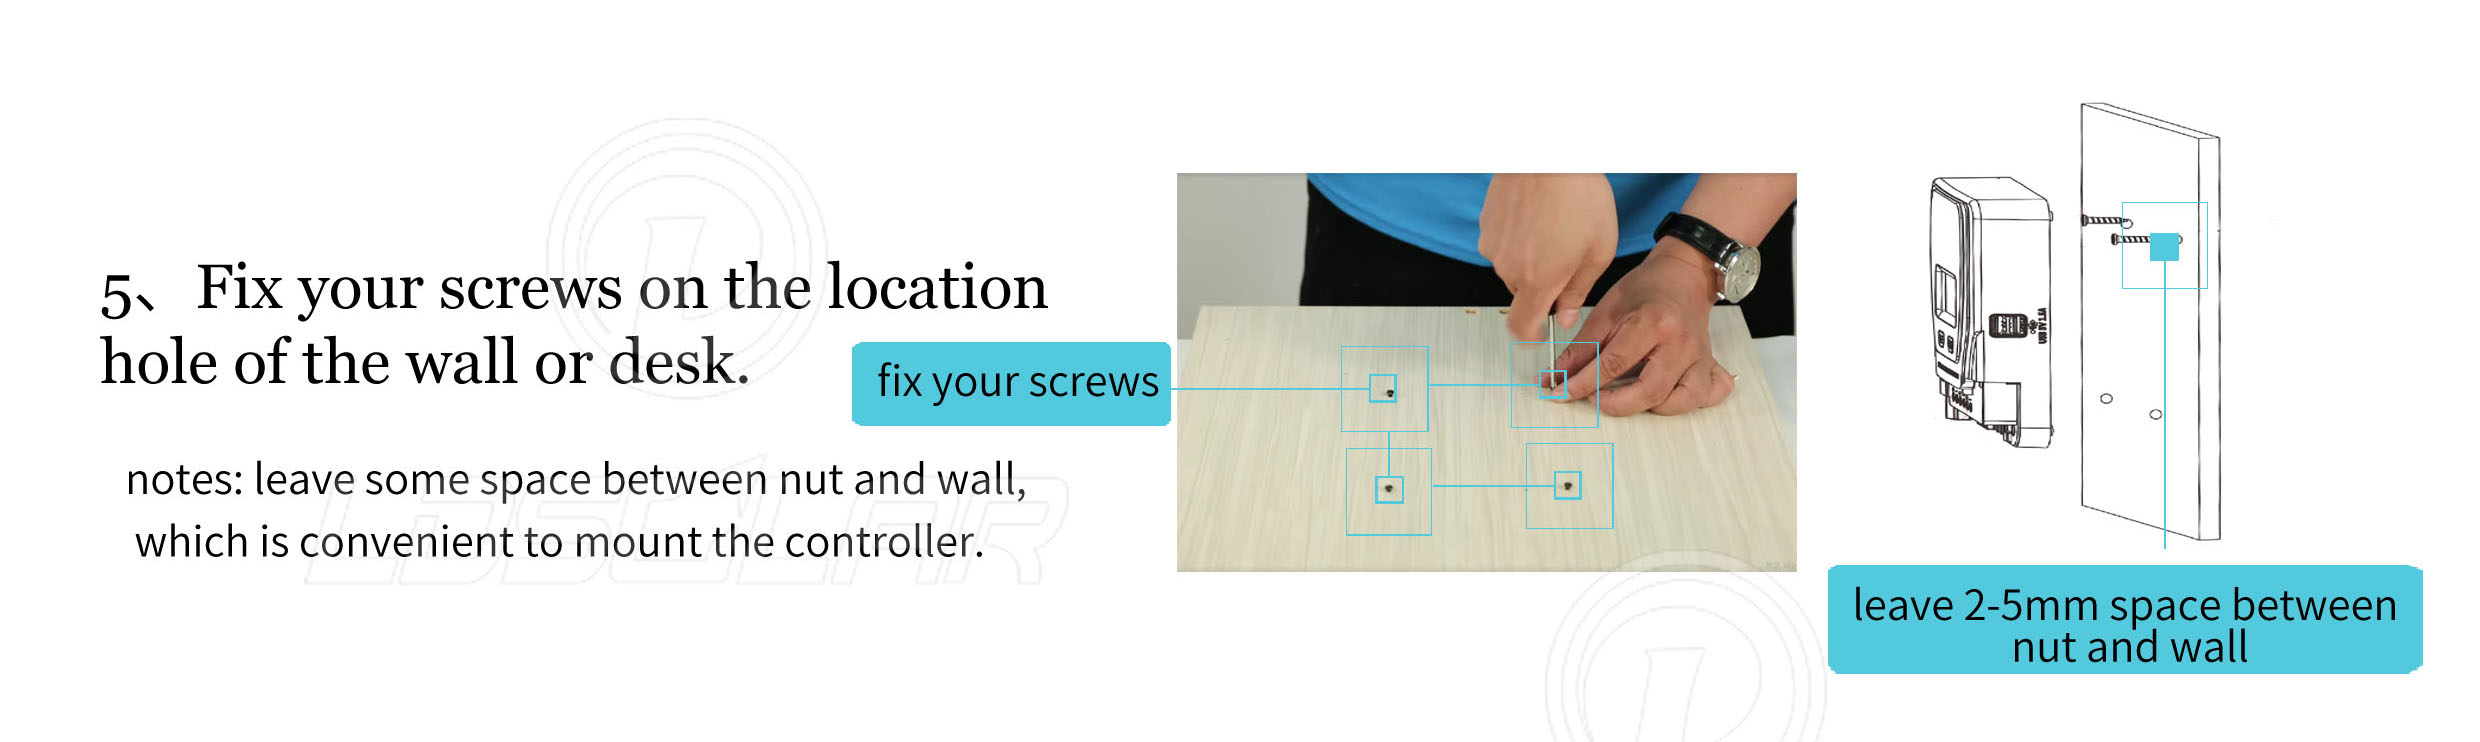
5. Fix your screws on the location hole of the wall or desk.
notes: leave some space between nut and wall,, which is convenient to mount the controller.
fix your screws,leave 2-5mm space between nut and wall
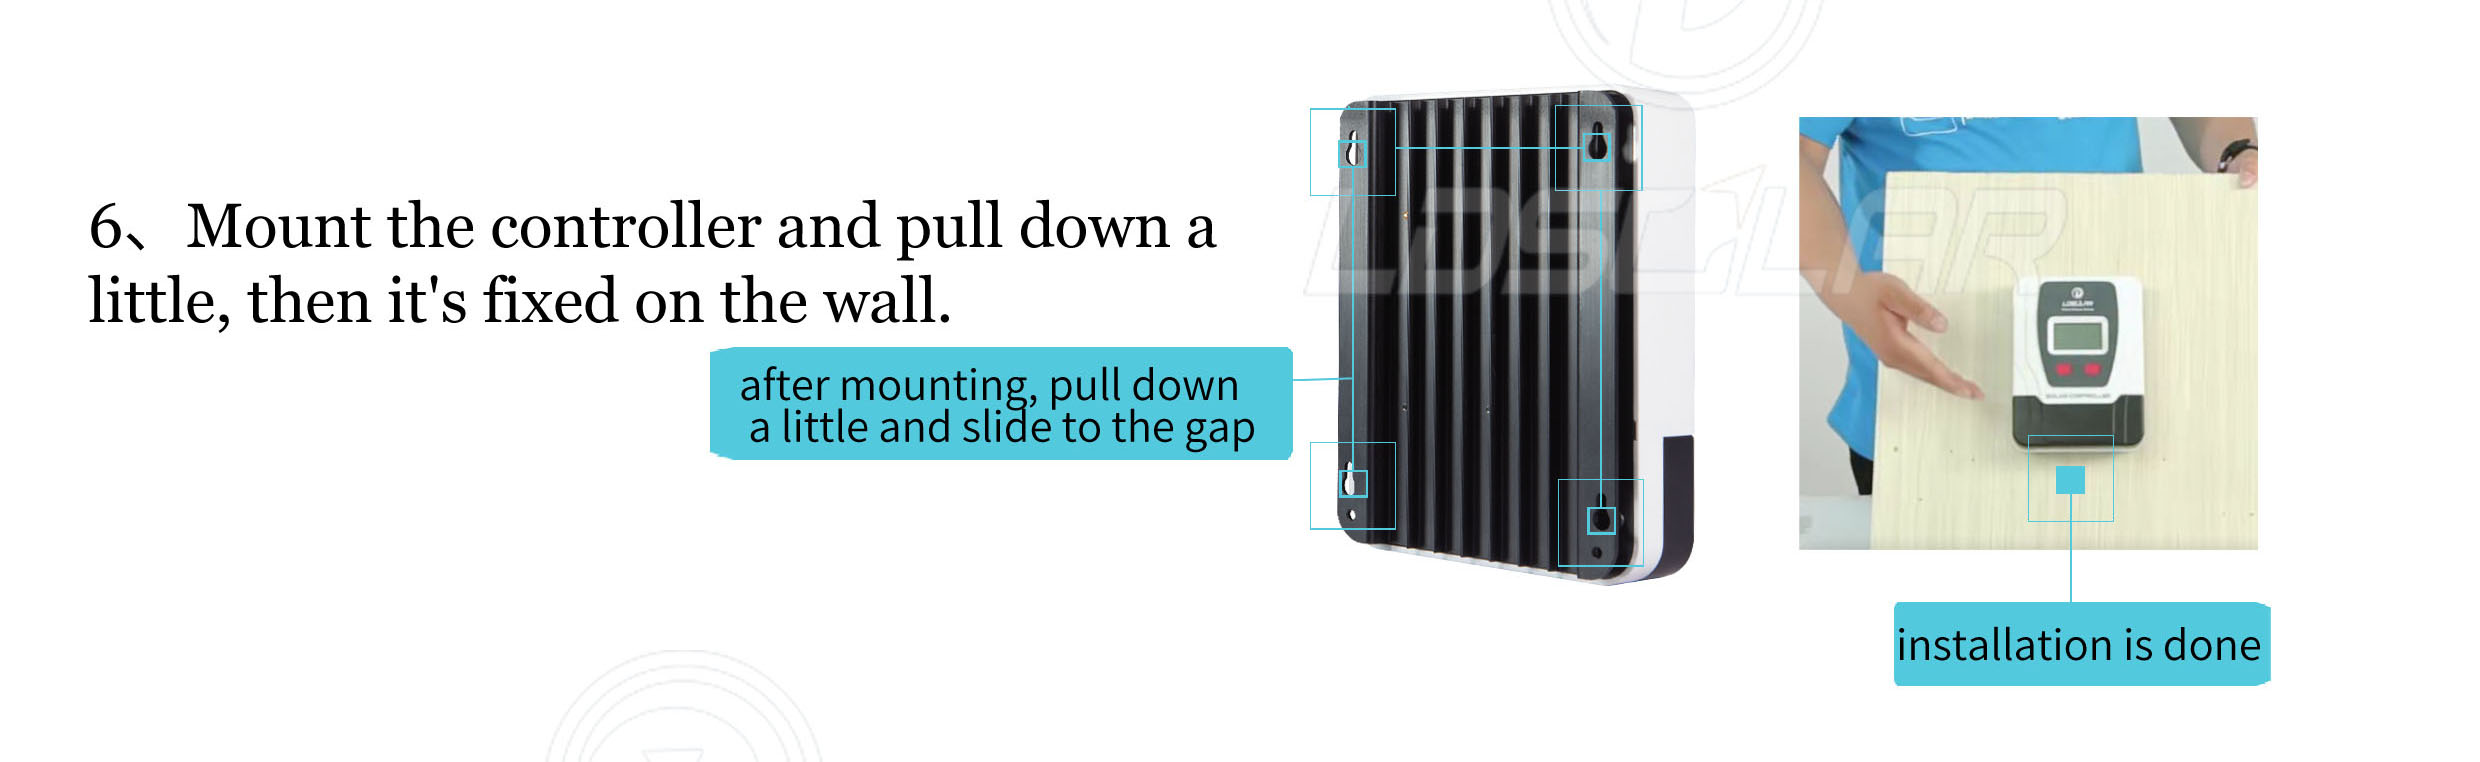
6. Mount the controller and pull down a little, then it's fixed on the wall.
after mounting, pull down a little and slide to the gap
installation is done
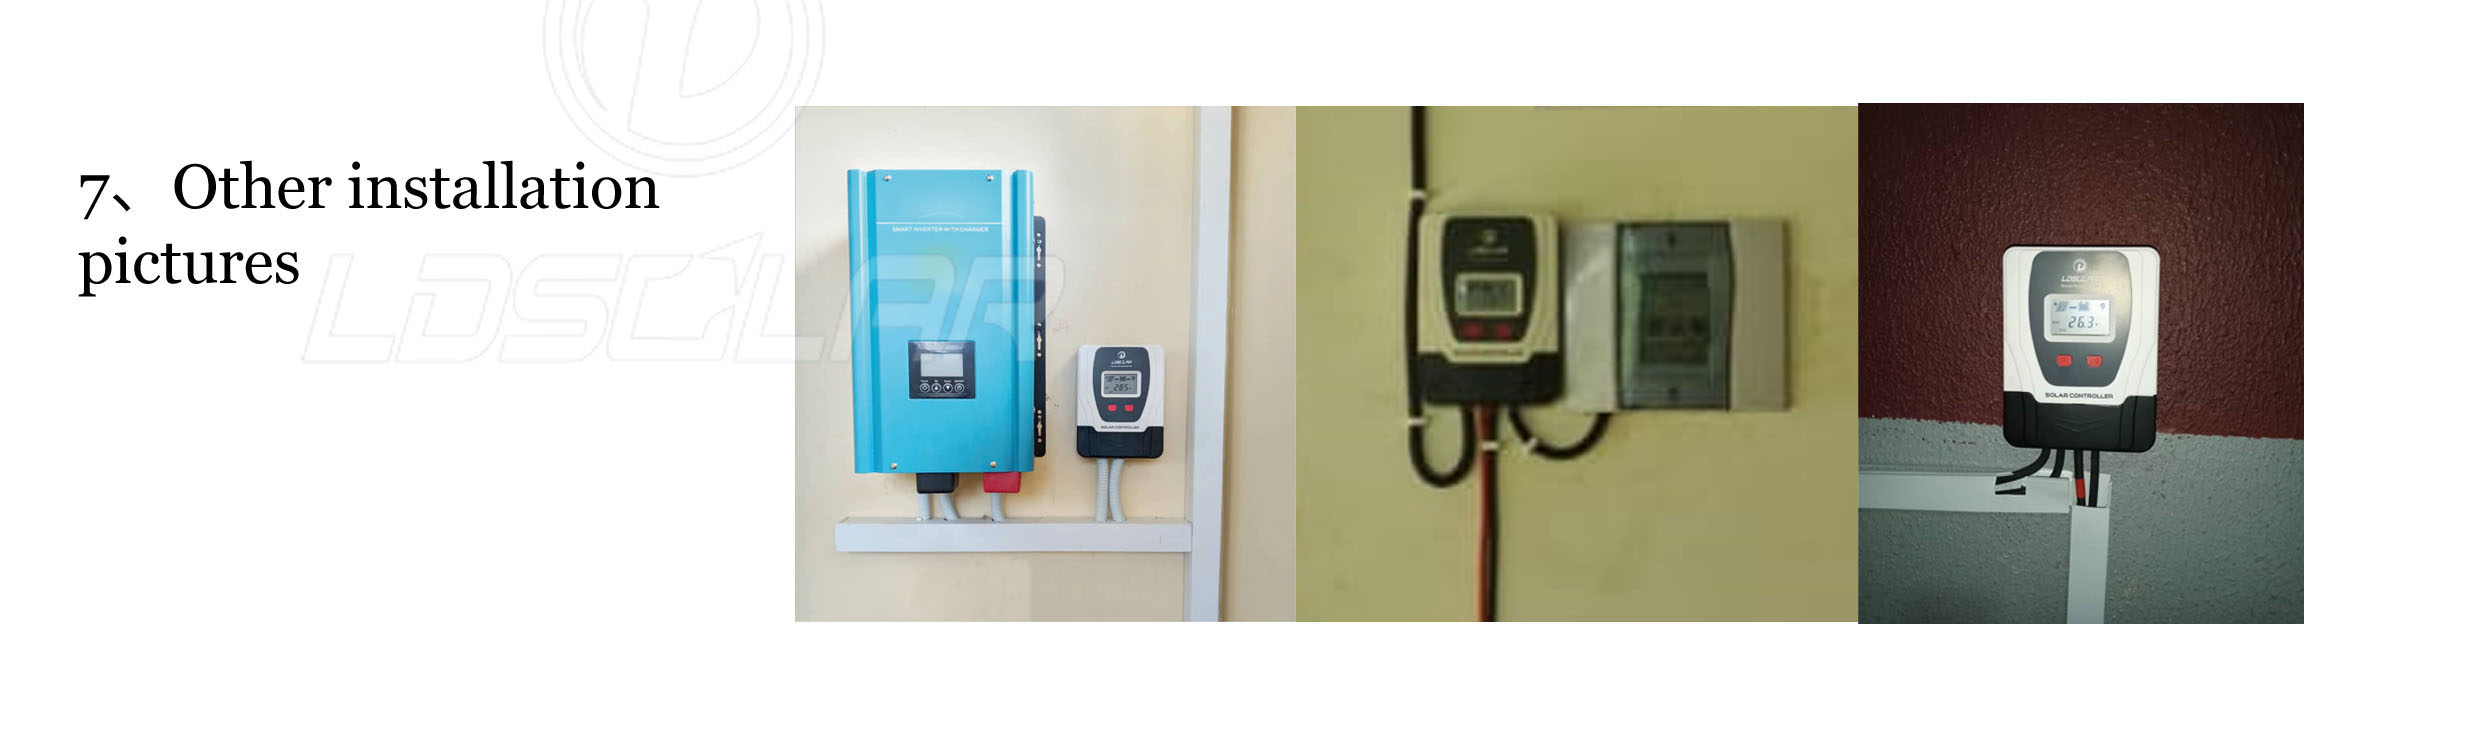
7. Other installation pictures